Chủ Nhật, 31 tháng 5, 2009
Now Playing: Your Water Drop Photos
Here's a quick slideshow of some of the water drop photography already showing up in the Strobist pool since Friday's tutorial post.
(NOTE: If you are reading via RSS or email, you may need to click on the post's title to view the photos.)
-30-
Thứ Năm, 28 tháng 5, 2009
How to Photograph Water Drops with One Speedlight
 Ever notice those cool water photos that drop into the Strobist Flickr Pool?
Water droplet photography is very easy to get started with, and you can get as complex as you want. There are three tricks to making beautiful, time-scultped water pictures with a single small flash: Light placement, timing and flash duration.
More, plus two videos, inside.
__________
Water Photography Basics
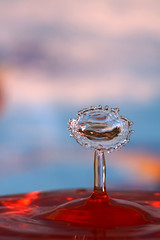 (Very cool water drop photos by Andy W., top, and Steve P., both from the Strobist Flickr Group pool. Click the pic for bigger versions.)
First tip: You are not lighting the water. Since water is a specular object, you are lighting what the water reflects. So you light the area (most likely the backdrop) that you see reflected in the still water from your camera position
As for timing, that one is easy -- just take the junk mail approach. Lots of water drops, lots of repetition, and something cool and unpredictable will come back. This is part of the fun. Just make sure you get your technical stuff down pat first, so when that perfect moment happens, you'll have a winner.
Last, and speaking of technical stuff, you will want shoot in a (relatively) dark environment so the flash pulse can effectively be your shutter speed.
The first video below (a basic how-to) suggests a setting 1/16th power. That's a pretty fast pop -- about 1/11,000th of a second for an SB-800, for instance. But you can get even faster times if you drop the power further. And when freezing a drop of water, microseconds matter.
The tradeoff? Aperture vs. pulse length. You will need enough power to get you enough aperture to carry the depth of field you want. But don't overdo the power to get excess aperture, as that'll needlessly stretch the pulse length of your flash.
In lighting, everything is a tradeoff.
Check out this excellent "how-to" video below, by Gavin Hoey. (RSS and email readers may need to click on the post title to view the videos.)
See? Easy, fun and cheap if you can get that flash off-camera.
And these same techniques can be amped up to yield more amazing photos. Artist Martin Waugh has built a career out of making art from drops of water. If you are into this kind of stuff, make sure to check out his amazing gallery to get a glimpse of just what is possible.
Just below, a video featuring Waugh from a segment of the Discover Channel show, "Time Warp." These guys are filming in 10,000 frames per second, which is Chase Jarvis Kung Fu territory. At the end, they actually have drops colliding with splashes in mid-air.
This is worth the wait for full-screen HD. Especially at about the 5:50 mark. (And I see my same old Nikkor 55/2.8 macro on the high-speed camera.)
Other than the obvious cool factor, the takeaway for me from this video was a look into Waugh's lighting. Background gets one color, and the top light gets another. This way, you get multiple colors in the water depending on the angle of the water surface being reflected.
A very cool project for a rainy afternoon, IMO. Or even better -- offer to take the setup into you kid's science class at school and let them try their hand at stopping time to study how liquids behave.
If you decide to try it and upload to Flickr, be sure to tag your photos with the words, STROBIST, WATER and DROP and upload it to the Strobist group. That way, they will come up in this search and we can all see them. (Check it out -- there are already some killer shots there.)
Or if you would rather blog your water droplet lighting exploits for the whole world to see, make sure to include the intact phrase "strobist water drop" (no quotes) and we can all see it via this Google blog search.
Thứ Ba, 26 tháng 5, 2009
UPDATE: Latest on the PW Flex/Minis
UPDATE: For those specifically looking to discuss the Flex and Mini -- especially Canon interference issues and workarounds -- the best place I have found is on the PW Flickr Group.
__________

For those of you interested the new PW Mini TT1 and Flex TT5 units, some updates on the Canon range issues -- and new features -- inside.
__________
Signal vs. Noise
First things first, there have been reports of interference shortening the working range with the new PWs and some Canon model flashes. It was surprising to me, as I did not experience any first-hand range issues in my testing of the units I had earlier this year. But I shoot Nikon, of course.
The range reports that were coming in were certainly enough to get PW's attention. And when they looked into them they found that the Canon flashes themselves were putting out some RF interference that shortened the range of the FlexTT5 and MiniTT1 units -- and significantly, in some cases.
Upon further investigation, it turns out that not only were some of the Canon units noisy (RF-wise) but there was also a wide range of variability when it came to the magnitude of the RF noise. Some individual units were moderately noisy, and others were more like front-row-at-a-Metallica-concert noisy. (FWIW, PW did not see the problem during development because while they bought a dozen or so Canon flashes for testing, those were relatively new flashes with similar serial numbers.)
"We should have just bought the the flashes off of eBay," joked PW's Jim Clark, noting that the noise range was all over the map depending not only on the flash model, but how long ago it was manufactured.
This radio frequency interference does serve to shorten the range of wireless TTL synching. But since the problems are coming from the flashes themselves, it is now the flashes that get the fix. Rob Galbraith has a very detailed post on his homebrew fix(es) for noisy flashes.

PW themselves have just annouced an "AC7 Shield" which should greatly extend your range if you happen to have a noisy flash. It also doubles as a flash umbrella adapter which gets the flash almost exactly onto the axis of the umbrella shaft. They are sending them out for free to Canon users who are experiencing problems with interference from Canon flashes. Nikon flashes (actually, all other brands of flashes) do not leak RF as do the Canons and thus are not affected.
(NOTE: The photo below actually shows the next-to-last version of the AC7 shield. Minor changes were made to the final version, renderings of which are available on the AC7 announcement.)

Long story short, if your Canon flash is spitting out RF noise, shielding it should bring dramatic improvements in wireless TTL range. PW tests are showing new ranges of several times the distance of unshielded flashes, all other things being equal. Rob put it through its paces, and wrote a very detailed review, here.
For the Nikon shooters, RF noise issues are reportedly nonexistent with the Nikon speedlights. And all seem to get along well with the upcoming Nikon PW models, which are due out soon and available for preorder.
It's a Platform, Not a Remote
If you are using the new Minis and/or Flexes, you definitely want to make sure to use your utility program and upgrade your firmware pretty regularly. They aren't just fixing bugs -- they are improving the feature set and providing new capabilities. (You can always get the latest firmware info at PocketWizard.)
You have to remember that these things are basically black-box Trojan Horses that allow PW to hack (in a good way) into all sorts of features and abilities of the various flash platforms.
Example: One of the more interesting new features is a little timing hack that shortens the length of the pulses that fire in FP mode.
This reduces the amount of energy used by the flash in FP mode, thus giving Flex/Mini users shorter recycle times and longer battery life. FP photogs who are used to waiting for the recharge at high shutter speeds (thus, more wasted flash energy) just got a little bit of their life back.
This is not small potatoes, either. Efficiency gains are reportedly as high as 70%, and this also translates to higher output in FP mode on the various pulsed shutter speed settings. Anyone who has ever pushed FP flash to its limits (not hard to do) will behappy to hear that some camera/flash combos are cranking out up to two more stops of light in that neighborhood. (More details here.)
Also, due to the wide range of max sync speeds and shutter delays of various models, some flashes are better suited to shift from HyperSync into FP sync at different shutter speeds. And PW has given control of that crossover point to the user. You can now choose at what point the remotes will toggle between HyperSync (increased max sync speed) and FP (hi-speed pulsed) sync. If you are hanging out in the grey area on your model, you might choose a different point to make the jump than staying with the previous 1/640th default.
It important to note that anything I write here may well be out of date and eclipsed by the next firmware update. We will not be hitting every update but may set up some kind of an archive table for info or something like that. Especially with respect to the different microsecond delay settings for various camera and flash models for the HyperSync settings.
Shortly after the Nikon-specific PWs are out, I'll put out a call for numbers and we'll set up a comprehensive table/matrix of settings. For instance, someone with a D3 and Profotos will have a totally different ideal sync offset than someone with a 5DII and a set of AlienBees.
This is important information, because it buys you the very best sync speed possible with your camera/flash combo. And higher sync speeds effectively mean greater effective flash range. We'll give the readers a little time to experiment, then crowdsource the info.
Of Mice and Men
 Last but not least, remember "Newton," the mouse who invaded Jim Clark's house last winter? He was thusly named because he yielded to the laws of Newtonian physics in the process of being spectacularly captured.
Well, Newton is once again free, looking for another house to invade for next winter.
Freeing him wasn't easy - Newton knew a good gig when he saw it. But he was finally coaxed out of his comfy "jail" and headed immediately for the trees. Yep, he went for the high ground, running right up the side of a tree fast enough to impress Jim, who just might have to engineer Mousetrap v2.0 next winter.
__________

For those of you interested the new PW Mini TT1 and Flex TT5 units, some updates on the Canon range issues -- and new features -- inside.
__________
Signal vs. Noise
First things first, there have been reports of interference shortening the working range with the new PWs and some Canon model flashes. It was surprising to me, as I did not experience any first-hand range issues in my testing of the units I had earlier this year. But I shoot Nikon, of course.
The range reports that were coming in were certainly enough to get PW's attention. And when they looked into them they found that the Canon flashes themselves were putting out some RF interference that shortened the range of the FlexTT5 and MiniTT1 units -- and significantly, in some cases.
Upon further investigation, it turns out that not only were some of the Canon units noisy (RF-wise) but there was also a wide range of variability when it came to the magnitude of the RF noise. Some individual units were moderately noisy, and others were more like front-row-at-a-Metallica-concert noisy. (FWIW, PW did not see the problem during development because while they bought a dozen or so Canon flashes for testing, those were relatively new flashes with similar serial numbers.)
"We should have just bought the the flashes off of eBay," joked PW's Jim Clark, noting that the noise range was all over the map depending not only on the flash model, but how long ago it was manufactured.
This radio frequency interference does serve to shorten the range of wireless TTL synching. But since the problems are coming from the flashes themselves, it is now the flashes that get the fix. Rob Galbraith has a very detailed post on his homebrew fix(es) for noisy flashes.

PW themselves have just annouced an "AC7 Shield" which should greatly extend your range if you happen to have a noisy flash. It also doubles as a flash umbrella adapter which gets the flash almost exactly onto the axis of the umbrella shaft. They are sending them out for free to Canon users who are experiencing problems with interference from Canon flashes. Nikon flashes (actually, all other brands of flashes) do not leak RF as do the Canons and thus are not affected.
(NOTE: The photo below actually shows the next-to-last version of the AC7 shield. Minor changes were made to the final version, renderings of which are available on the AC7 announcement.)

Long story short, if your Canon flash is spitting out RF noise, shielding it should bring dramatic improvements in wireless TTL range. PW tests are showing new ranges of several times the distance of unshielded flashes, all other things being equal. Rob put it through its paces, and wrote a very detailed review, here.
For the Nikon shooters, RF noise issues are reportedly nonexistent with the Nikon speedlights. And all seem to get along well with the upcoming Nikon PW models, which are due out soon and available for preorder.
It's a Platform, Not a Remote
If you are using the new Minis and/or Flexes, you definitely want to make sure to use your utility program and upgrade your firmware pretty regularly. They aren't just fixing bugs -- they are improving the feature set and providing new capabilities. (You can always get the latest firmware info at PocketWizard.)
You have to remember that these things are basically black-box Trojan Horses that allow PW to hack (in a good way) into all sorts of features and abilities of the various flash platforms.
Example: One of the more interesting new features is a little timing hack that shortens the length of the pulses that fire in FP mode.
This reduces the amount of energy used by the flash in FP mode, thus giving Flex/Mini users shorter recycle times and longer battery life. FP photogs who are used to waiting for the recharge at high shutter speeds (thus, more wasted flash energy) just got a little bit of their life back.
This is not small potatoes, either. Efficiency gains are reportedly as high as 70%, and this also translates to higher output in FP mode on the various pulsed shutter speed settings. Anyone who has ever pushed FP flash to its limits (not hard to do) will behappy to hear that some camera/flash combos are cranking out up to two more stops of light in that neighborhood. (More details here.)
Also, due to the wide range of max sync speeds and shutter delays of various models, some flashes are better suited to shift from HyperSync into FP sync at different shutter speeds. And PW has given control of that crossover point to the user. You can now choose at what point the remotes will toggle between HyperSync (increased max sync speed) and FP (hi-speed pulsed) sync. If you are hanging out in the grey area on your model, you might choose a different point to make the jump than staying with the previous 1/640th default.
It important to note that anything I write here may well be out of date and eclipsed by the next firmware update. We will not be hitting every update but may set up some kind of an archive table for info or something like that. Especially with respect to the different microsecond delay settings for various camera and flash models for the HyperSync settings.
Shortly after the Nikon-specific PWs are out, I'll put out a call for numbers and we'll set up a comprehensive table/matrix of settings. For instance, someone with a D3 and Profotos will have a totally different ideal sync offset than someone with a 5DII and a set of AlienBees.
This is important information, because it buys you the very best sync speed possible with your camera/flash combo. And higher sync speeds effectively mean greater effective flash range. We'll give the readers a little time to experiment, then crowdsource the info.
Of Mice and Men
 Last but not least, remember "Newton," the mouse who invaded Jim Clark's house last winter? He was thusly named because he yielded to the laws of Newtonian physics in the process of being spectacularly captured.
 Well, Newton is once again free, looking for another house to invade for next winter.
Freeing him wasn't easy - Newton knew a good gig when he saw it. But he was finally coaxed out of his comfy "jail" and headed immediately for the trees. Yep, he went for the high ground, running right up the side of a tree fast enough to impress Jim, who just might have to engineer Mousetrap v2.0 next winter.
Chủ Nhật, 24 tháng 5, 2009
Variations on a Two-Light Theme, Pt. 2
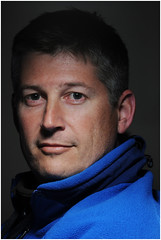 Last in this series we looked at Riaz, lit entirely by flash against a darkish wooden wall. At left is Brett, who was lit right where he sat in a classroom chair in an unfinished commercial building with a primed drywall background.
This time around: High-axis key light with just enough strobe on the background to separate it from black. More inside.
__________
Start With the Key
I'll give you one guess as to what I used for a key light. It is really my go-to light mod for close-in speedlight portraiture now. Broken record, I know. But the not-hard / not-soft look, plus total control, in a small package is too much to resist for me.
If we come in high and in front of Brett, we create a shaft of "third-degree" -type light that you might see in an interrogation scene in a movie. The shaft is hard (-ish) and pointed straight down. Actually, it is even pointed a tad away from him and back toward me. Even so -- and even with the control you get with the SB-III -- his hair was still a little hot.
So we gobo'd the edge closest to Brett with two strips of gaffer's tape to make a quickie barn door. This gave the shaft of downlight a more defined edge. Which, in turn, created a more coming-into-a-shaft-of-light look. That's why the light gets darker as a crawls up Brett's head.
It is a crisp, 3-D look, IMO. Not nearly as out-there as what Peter Yang did earlier, but definitely on the same branch of the family tree.

Here is the setup shot, courtesy Syl Arena. The "boom" holding up the SB-800 / SB-III keylight is the flash arm off of a CSB Micro Mini. (I end up using that outfit chopped into separate parts just as often as I use it together.)
You really need some sort of boom on this -- gotta get that light right out front, and you do not want it moving. In that close, inches matter a lot.
So, our key is relatively powerful because it is in very close. Even dialed way down we will get plenty of aperture to hold focus through the face. Another bennie is that we have the ability to take that nearby white wall to black. This is all because of key-to-subject distance.
Now our white wall is totally black, which means we can make it anything with a second strobe. I chose to aim the second flash at the back wall, using a dome diffuser. This takes the flash pattern out of play and makes the tone of the wall a pure distance thing -- with a smooth gradient. If I want a fast-falling gradient, I put the light in close. If I bring the light away from the wall, the gradient gets less dramatic.
I can control the gradient's actual tone with the power setting on the flash, so the two variables can be adjusted independent of each other. I could make a barely separating grey wall by moving Brett and the light closer to the background wall, but I would lose this gradient control.
Variations on a Variation
And besides, I can do a lot with the rest of that key beam if I want. Remember, Brett is on the feathered edge of the beam, which means that we have a lot of lighting power being wasted out in the space in front of him.
I can catch that with a big reflector in low and fill those shadows if I want. Of I can put that reflector in front, just out of the frame and angled toward Brett's face for fill light very similar to that we used on Riaz. I can make the reflected light as bright or dim as I want by including or excluding the full force of the beam from the key light.
If I have Brett on the edge of the key beam, the reflected light could actually end up being brighter than where Brett is in the key. Lots of possibilities -- even maybe that pillow trick, à la John Keatley.
Long story short, the nose and chin shadows depths could be placed at any density you want. But the hard, toplight is also what gives the photo it's look. So you don't wanna rush in there willy-nilly and "fix" everything.
Just understand that you have complete choice in the tonal range of the photo -- even if you are just using two strobes and no ambient.
Drop and Give Me Twenty
For the last six months this site has been long on spoon-fed information and short on homework. The result: A bunch of soft, pasty, newcomers who have drifted in since the last time we did any real work around the place. You newbs have been coddled long enough.
So, coming in June ...
Boot Camp II
Are you worthless and weak? Do you cry for your mama every time you need to balance a couple of flashes with the ambient?
Are you still using TTL bounce flash?
We are here to save you from yourself. This summer, you'll have the opportunity to get off your arse (as Zack would say) and do something.
Worldwide Recession Edition
Yeah, we know times are tough all over. Quitcher bellyaching and use this time to build your skills, to make contacts -- maybe even help someone out.
And just to make things more interesting, we gots prizes coming. Each assignment will have a little bonus attached to it for the best butt-buster of the bunch.
But more than that, you'll get a chance to see what photographers from all around the world create while working with your exact assignment.
So, recharge those NiMH's, field strip your LP604's and bore-sight those home-made straw grids. Spread the word: Boot Camp II begins shortly, at oh-dark-thirty.
As you were, maggots.
Thứ Năm, 21 tháng 5, 2009
MetalHead Makes Your Home Depot Boom More Functional, Less Embarrassing
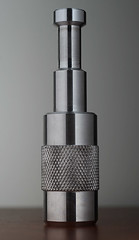 This is is a MetalHead. At least, that's what I am calling it.
 I first saw one while teaching in Paso Robles earlier this month, and it is a pretty neat idea.
It is made of solid, turned aluminum (or aluminiumium, for you syllable-happy UK'ers.) It converts the threaded end of a standard painter's pole -- of which there are many inexpensive and varied choices -- to a 5/8" male stud. And it does so without adding too much weight.
This makes it perfect for mounting speedlights (via the umbrella swivel) for your voice-activated-booming pleasure. It is perfect for when you wanna go all Nick Turpin on someone.
Working in manual (like Nick does) you'd want to keep your distances consistent. I am not a heavy wireless TTL user, but for event / wedding shooters this would also be a sweet combo with a RadioPopper or a PW Flex. Or plain old CLS / eTTL, of course.
You can read much more about it on PixSylated (including an ideal extendable HD pole to mate it with). They are available for $18.99, here, and $21.99, here.
__________
(Click on the pic if you want to know how it was lit with one, handheld speedlight.)
-30-
Thứ Ba, 19 tháng 5, 2009
What it Takes to Light a Car
 I get a lot of upstream questions about lighting cars, and to be honest I am frequently at a loss what to say.
To shoot a car effectively, you generally need huge soft boxes (or silks), many watt-seconds of light and a large, dedicated space. Take this photo, for instance, uploaded into the Strobist pool by Bryan Cook. It was lit by about $30,000.00 worth of Profoto gear, in a large studio designed exclusively for shooting automobiles.
Just kidding. He did it in a cramped garage with five speedlights.
Keep reading for a quick walk-thru, and how you could do something like this with just one speedlight.
__________
 Here is the setup, minus two flashes. He used one on-camera (which traveled on-cam with this setup shot) and one in upper right that he could not get into the frame. You can see the light stand, tho.
Sez Bryan:
" ... Five strobes: One camera left and up high, one camera right snooted on the wheel, one up high camera right toward the rear of the car, one behind the right rear of the car, and one on camera zoomed 200mm at the front fascia. ..."
He said would also have liked to have a couple extra speedlights to shoot under the car and to flick a little light on the side mirror. Yep, and I could also see a CTO'd interior light -- just a hint -- to give a smidge of defined info behind those tinted windows.
You can do all of that with just one flash by shooting multiple frames and combining layers. You want things to be very still, of course, but you can solve any slight camera movement problems with the "align layers" tool in Photoshop. Just shoot a tad loose as there will be a slight crop involved after the alignments.
When you get the layers aligned, I like to work with the work-in-progress on top and the incoming layer beneath. That way you can either choose "lighten" (lightest pixel wins), "screen" (like a classic, film-based multi-exposure) or simply erase to the new layer with a brush of any shape, size and/or opacity.
If you want to know any more, go find someone like Ben Willmore or Matt Kloskowski, who wrote the book on the layers stuff. Pathetically, I just start to get interested in it when it keeps me from having to buy more flashes.
For more auto inspiration (or perhaps a spasm of jealousy) check out Ken Brown's classic, all-in-one-frame shot of a vintage Mercedes Gullwing with just two bare SB-24's. Or you can go all bumper to bumper on it and join the Car Strobist group on Flickr.
Thứ Hai, 18 tháng 5, 2009
Eat Your Heart Out, "Ray Flash"
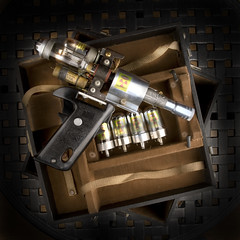 For a moment, light is taking a back seat to creativity. Strobist reader Cohophoto whipped this DIY Steampunk Ray Gun up out of parts from old radios and cameras.
The closer you look at this thing, the better it looks, too. It's just so off-the-scale cool, I don't care how he lit it.
But you can see the lighting setup shot (and a link to the set of assembly photos) inside.
__________

In the end, he used HDR and some heavy burning along with the lighting. But again, I frankly do not care. This thing is just too flippin' sweet not to run.
I want one.
(The full set of photos is on Flickr, here.)
Chủ Nhật, 17 tháng 5, 2009
On Off Assignment: Blown Shoot
Last Wednesday, I had a shoot fall through at the last minute because of a miscommunication with the subject. He was one place and we are at another, gear unpacked and two assistants at the waiting.
No shoot. Just wasn't gonna work with our various time constraints. We'll re-sked. But rather than pack it up and go home, we decided to make some use of our time and do a little testing.
__________
Okay, So Now What?
Brad Snyder and Dan Rick had responded to a quick query I put up last week looking for an assistant for an environmental portrait shoot for the Howard County Arts Council. I went with two early responders in case one did not show. Of course, they both did. Maybe I shoulda scheduled two subjects instead ...
Since we were to be shooting outside on a sunny day, I had brought along a WL600, a big Octabox and a deep-dish sports reflector in addition to a couple of SB-800s. That second light mod might seem a little out of place, but I had been itching to test it as a portrait light source for quite a while. So that's exactly what we did.
 The inventively named 11R Reflector (c'mon, Paul, where's that famous imagination?) is designed for long-throw sports lighting. It throws a 50-degree beam which is almost two stops brighter (1.8) than the standard 7" AlienBees / White Lightning reflector.
And being 11" across at the business end, it is not a totally hard light source, either. Much like the SB-III it takes the edge off a little compared to a normal reflector. This not-hard / not-soft quality is a very interesting zone to me.
So, let me get this straight: 1.8 stops more light than a standard bare reflector, a beam that I can easily control and soft enough to get really interesting -- and powerful -- light up close? That's gonna set me back some clams, I am thinking.
Nope. Thirty five bucks. It is a total no-brainer for AB/WL owners, IMO. The sports guys use them for long-throw lighting in stadiums (stadia?) for more control and efficiency. But I first started thinking about it after talking to Peter Yang about his William Fallon portrait.
And they appear to have another model coming out. It is an 11", deeper dish (30-degree throw) and just $30. And they are doing grids for it, too. I'll be trying that one out as soon as it is available.
Testing With Brad
 We actually tried a lot of cool stuff here, but my favorite was this daylight portrait of Brad. A White Lightning 600 with an 11R sports reflector was the main light, up high and right in front of him. You can see the hard/soft look I am talking about, and as a bonus we were able to keep the key off of the wall because of the 50-degree beam.
We are working well over the full daylight, and we are in the shade, too. So the ambient is not much of a factor at all. That (no ambient fill) means we are going to have to do something about the hard, direction shadows under Brad's chin.
So we stuck one of the SB's on front of Brad on the ground, pointed up, and dialed the power up until it wrote in some detail underneath (and on the shirt and hands) without calling too much attention to itself. Can't remember what the setting was, but I wanna say 1/4 power. Nothing that would slow down the shooting pace.
But that flash is gonna throw a big, film-noir-looking shadow behind Brad on the wall, so we partially disguised that with a second SB aimed at the wall and held by Dan, our resident VAL for this shot. It was set to a similar, middle of the range power setting. The WL600 was dialed way down, as the 11R made it very powerful within that narrow beam. And the beam width gave us total control of the wall's tones, too.
I like this sculpted light look, even more so that I can do it at full-blown sunlight levels if I need, and all via battery power. (I was using a Vagabond II battery on the WL600.)
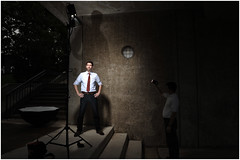 Here is the wide shot, which shows the light locations, just how far we were working over the shade ambient and even the full sun light levels nearby. This is almost all flash -- coulda shot it at midnight.
In fact, this would have been better at night because we could have let that sodium vapor light burn in to texture the wall around it. If you recognize the location, that's because it is right around the corner from where we shot another daylight portrait last year. (We are in the alcove on the left in the second photo down.)
I love that wall for its tone and texture. If you are local to Columbia, MD, it is right under the fountain near the People Tree at the lakefront.
Blown/Saved
So, from a botched assignment, we got a really neat first look at what (for me) is a new portrait light source. I can recommend it as a very versatile and cheap addition to any AlienBees (or White Lightning or Zeus) shooter's kit. Hard but soft, with a controllable beam and very powerful.
That last part is important, as it also means you can back an AB up long distances to get a more evenly lit scene if you are lighting something big. Hard to go wrong for $35.
And the no-pressure test was a great first step. Just two days later I used it as a main light in an indoor portrait shoot, with an actual subject present and everything, and expect to be doing more with it in the near future.
No shoot. Just wasn't gonna work with our various time constraints. We'll re-sked. But rather than pack it up and go home, we decided to make some use of our time and do a little testing.
__________
Okay, So Now What?
Brad Snyder and Dan Rick had responded to a quick query I put up last week looking for an assistant for an environmental portrait shoot for the Howard County Arts Council. I went with two early responders in case one did not show. Of course, they both did. Maybe I shoulda scheduled two subjects instead ...
Since we were to be shooting outside on a sunny day, I had brought along a WL600, a big Octabox and a deep-dish sports reflector in addition to a couple of SB-800s. That second light mod might seem a little out of place, but I had been itching to test it as a portrait light source for quite a while. So that's exactly what we did.
 The inventively named 11R Reflector (c'mon, Paul, where's that famous imagination?) is designed for long-throw sports lighting. It throws a 50-degree beam which is almost two stops brighter (1.8) than the standard 7" AlienBees / White Lightning reflector.
And being 11" across at the business end, it is not a totally hard light source, either. Much like the SB-III it takes the edge off a little compared to a normal reflector. This not-hard / not-soft quality is a very interesting zone to me.
So, let me get this straight: 1.8 stops more light than a standard bare reflector, a beam that I can easily control and soft enough to get really interesting -- and powerful -- light up close? That's gonna set me back some clams, I am thinking.
Nope. Thirty five bucks. It is a total no-brainer for AB/WL owners, IMO. The sports guys use them for long-throw lighting in stadiums (stadia?) for more control and efficiency. But I first started thinking about it after talking to Peter Yang about his William Fallon portrait.
And they appear to have another model coming out. It is an 11", deeper dish (30-degree throw) and just $30. And they are doing grids for it, too. I'll be trying that one out as soon as it is available.
Testing With Brad
 We actually tried a lot of cool stuff here, but my favorite was this daylight portrait of Brad. A White Lightning 600 with an 11R sports reflector was the main light, up high and right in front of him. You can see the hard/soft look I am talking about, and as a bonus we were able to keep the key off of the wall because of the 50-degree beam.
We are working well over the full daylight, and we are in the shade, too. So the ambient is not much of a factor at all. That (no ambient fill) means we are going to have to do something about the hard, direction shadows under Brad's chin.
So we stuck one of the SB's on front of Brad on the ground, pointed up, and dialed the power up until it wrote in some detail underneath (and on the shirt and hands) without calling too much attention to itself. Can't remember what the setting was, but I wanna say 1/4 power. Nothing that would slow down the shooting pace.
But that flash is gonna throw a big, film-noir-looking shadow behind Brad on the wall, so we partially disguised that with a second SB aimed at the wall and held by Dan, our resident VAL for this shot. It was set to a similar, middle of the range power setting. The WL600 was dialed way down, as the 11R made it very powerful within that narrow beam. And the beam width gave us total control of the wall's tones, too.
I like this sculpted light look, even more so that I can do it at full-blown sunlight levels if I need, and all via battery power. (I was using a Vagabond II battery on the WL600.)
 Here is the wide shot, which shows the light locations, just how far we were working over the shade ambient and even the full sun light levels nearby. This is almost all flash -- coulda shot it at midnight.
In fact, this would have been better at night because we could have let that sodium vapor light burn in to texture the wall around it. If you recognize the location, that's because it is right around the corner from where we shot another daylight portrait last year. (We are in the alcove on the left in the second photo down.)
I love that wall for its tone and texture. If you are local to Columbia, MD, it is right under the fountain near the People Tree at the lakefront.
Blown/Saved
So, from a botched assignment, we got a really neat first look at what (for me) is a new portrait light source. I can recommend it as a very versatile and cheap addition to any AlienBees (or White Lightning or Zeus) shooter's kit. Hard but soft, with a controllable beam and very powerful.
That last part is important, as it also means you can back an AB up long distances to get a more evenly lit scene if you are lighting something big. Hard to go wrong for $35.
And the no-pressure test was a great first step. Just two days later I used it as a main light in an indoor portrait shoot, with an actual subject present and everything, and expect to be doing more with it in the near future.
WTJ Gets a Sneak at Dan Winters' New Book
Very psyched to see this. I did not even know a book had been in the works.
I love Dan Winters' work. Especially his lighting, of course, but I love the whole package. There is an inspiration folder on my laptop which includes the work of a selection of photographers I really admire. He's in there, of course. But Winters is one of only four photographers whose work is with me (via iPhone) all of the time.
Many thanks to Andrew Hetherington at WTJ for the full flip-thru. (If you are reading this via RSS or email, you may have to click through on the post title to see the vid.) The book is shipping from Amazon starting today. My week just got a little better.
__________
UPDATE: NPR had a nice writeup with 13 photos from the book, here.
__________
(Via WTJ)
-30-
Thứ Tư, 13 tháng 5, 2009
Moshe Brakha's "Dirty Light"

Photo ©Moshe Brakha
Photographer Moshe Brakha has come a long way since the late 70's, when he hit the Hollywood scene like a runaway train. But he would feel right at home in a parking garage Strobist meetup.
Even with such high-horsepower subjects (and photos) he was all about small, battery-powered strobes and hot lights. As of this week, he has a retrospective show that just landed at The Grammy Museum in Los Angeles.
Inside, a conversation with an A-Lister that any Strobist can appreciate . . .
__________
Light as a Language
Brakha has always considered light an integral part of the photo -- just as important as the subject, the setting -- everything. He preferred hard light sources, even when everyone else seemed to be going for soft boxes.
"I spent many years shooting only with a Norman 200," he said, referring to the battery-powered Norman 200B flash. "First, I didn't have the money to buy a big flash, and second, it became like, by nature."
Later, he added more Normans to the mix, and started experimenting with different dishes for a different look. That combination of multiple sources and dishes gave him the ability to create more complex lighting.
He has been a seat-of-the-pants lighter from way back. He never uses a meter. Never used modeling light with strobes. (The Norman battery modeling lights left much to be desired, like most portable modeling lights.)
"It is all to your eye," he said. "Polaroid and eye."
His inspirations were Guy Bourdin, Brassaï and Weegee -- photographers who worked with hard lights. "I'm not coming from the school of Avedon," he says. "That's not my school at all."
At one point in his career, he eschewed strobes altogether in favor of "movie lights," as he calls tungsten lights. He later combined the two, working with tungsten lights and strobes:
"That's the style we used to call it -- the shake and bake, you know? I used to shoot everything half a second, full second. Even when I used to shoot strobe outdoors, at nighttime, it's always one-second exposure -- to get the shake, you know?"
Brakha brings careful planning and an eye for detail to his props and settings. "Everything I do, I am pre-planner -- I am a Capricorn," he said. "I do every bit of thinking before, you know? I never go cold to a shoot. I know everything I am doing, how I am going to light -- everything. Then you chase. You chase your idea."
Arnold Schwarzenegger, c.1985
For the portrait of Schwarzenegger, above, Brakha went with one hard strobe in front and multiple hot lights in back.
"Arnold Schwarzenegger was in the shake and bake period. Everything had to be shake and bake. You shoot with the tungsten light in the back, and you always shoot with the strobe in front. The front is always dark, and the back is with light.
You have a long exposure, and you can shake the camera, you know?Then the front doesn't get lit."
In Arnold's case, the strobe was the battery-powered Norman 200, which is of course balanced for daylight. The hot lights would normally be much warmer than the strobe. To fix this, you either have to gel the hot lights with a blue (CTB) gel, or warm up the strobe (CTO) and shoot on tungsten balance.
All of the light from the back is tungsten, and the camera movement (slight, in this case) paints not only the chain movement but also shimmies the rim lights on his face.
Brakha has come full circle and now shoots mostly with tungsten hot lights. And he is embracing imperfection, too.
"Now, I don't care about flare, I don't put on the sun shade, I like to be really free. I love all this dirtiness that comes through the lens. I love it, you know? Now, even if I do strobes, it is always very dirty. I am a dirty light -- that's what I call myself."
I am very free about light. But, at the same time, I know what I am doing. I know what the light is going to do before I do it. It is gorgeous. It is sick, it is so beautiful. And that is what drives you to do great pictures. Those kinds of things -- what's next, what's next?"
__________
A retrospective exhibit by Brakha, "Occupation Dreamer," opens at the The Grammy Museum in Los Angeles, this week. It features many of the icons of music he shot early in his career. Check it out if you are local to the area.
If you won't be getting to L.A. this summer and would like to see a different version of the show online, Digital Fusion did a great display of an earlier show in New York from June 2008.
For more of Brakha's work, visit his website.
Kirk Tuck on the Minimalist Studio
 Kirk's latest book landed on my doorstep just before I headed out to Dubai, and I only now have gotten a chance to read it.
 Reader's Digest version: If you liked his first book, you'll probably be very comfortable with his latest effort. And if some of this lighting stuff on this site leaves your head spinning, this may be the book for you.
More, inside.
__________
Minimalist Lighting: Professional Techniques for Studio Photography
So here's the thing. In reading through Kirk's new book I found myself continually waiting for the Big Unveiling, but it never happened. It wasn't until I finished it that I realized why that was: This is a book for beginners who are thinking about getting into home studio photography. And that's not me -- I am neither a beginner nor a studio guy.
When taken that context, the book made perfect sense.
Twenty years ago, I would have been all over it. But these days, I'm more 'been-there-done-that.' I am looking for McNally to show me how to light the Statue of Liberty with a bazillion SB-900's, or for Annie to tell me what she was thinking when she asked The Queen to "lose the crown" during a portrait session.
That's my problem: I am looking for pure heroin, and Kirk is offering the gateway drug.
And that thought didn't even hit me until I was reading some negative comments on the Flickr threads about how Hot Shoe Diaries was too anecdotal, not enough diagrams and setup shots, etc.
I thought the reviewers in question were insane. Which, of course, is my default reaction when anyone disagrees with me. It's like on the highway: Anyone driving faster than me is a maniac, and anyone going slower than me is an idiot.
[Spiffy Subhead Tying Together Ferraris, Burps, Costco and Bacardi 151 to go Here]
In the course of a given month about 325,000 people stumble into this site. I tend to interact with a relatively small number of, um, enthusiastic readers who cannot get enough of this lighting stuff. Don't take that as a knock, either -- I am the same way. But it definitely colors my perception of the readership.
I am beginning to suspect that there are a far greater number of lurkers who are dabblers. They are the curious, the tentative, the folks who are not exactly brimming with confidence yet. And Kirk's book is aimed more at them than at me.
So the former folks -- the rabid, "lighting Ferrari" types, might tear through Minimalist in 20 minutes and still be hungry. There are no D700s dangling upside down from Manhattan ladder trucks and there is absolutely no royalty whatsoever -- bejeweled or otherwise.
(I just got a mental image of Jeremy "Ogalthorpe" Center, chewing through everything Strobist has to offer in about 30 seconds, burping -- twice -- and then bellowing out, "Enough of this tripe! More! I want more! Bring me the Collins DVDs!)
But the latter folks -- the ones who maybe have not consumed this site's entire archive in one caffeinated sitting -- might actually appreciate the setup shots, the simple approach, the hand-holding, etc. I'm thinking, I dunno, let's call 'em Toyotas maybe. And while Ferraris are undeniably cool, there are an awful lot of Toyotas around.
Kirk is not writing for the 99th percentile. He is aiming at the people who have not yet dived headfirst into full-blown obsession. He gets into spaces, gear, lighting techniques (of course), money allocation, etc., when planning a small or home studio.
Example: Forget the wide-carriage inkjet and get to know your local Costco's ICC printer profiles. Beautiful 12x18's for $3 each, and you never have a nightmare about an ink clog again.
Kirk doesn't even assume you are married to strobes -- maybe you are a "hot lights" kind of person. Don't laugh -- lots of stuff is done with hot lights today. Awesome recycle time, and excellent in the modeling department.
If McNally's books are a walk on the wild side, Kirk's books are a guided stroll in the park, where every tree has a horticultural label and there are no dangerous animals lurking about waiting to jump out and overwhelm you.
This is a cup of Earl Grey tea to McNally's Bacardi 151.
Take a Sip Yourself
If you are not sure if this is your particular cup of tea, I highly recommend popping over to the Amazon page and making use of their "Look Inside the Book" feature. Amherst has wisely opted in and made sections of the text available for tire-kickers.
Check out the viewable table of contents and you will know right away if this one is aimed at you. My guess is his approach will speak to you or it won't, with few people on the fence.
And if Minimalist Lighting can bring new people into the game, I say welcome aboard. It's very easy for a bunch of lighting fanatics (and I count myself a member of that group) to forget that we were once exactly the people for whom Kirk is writing.
__________
:: Minimalist Lighting: Professional Techniques for Studio Photography ::
Two of My Favorites, Together
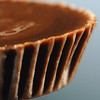 Today one of my favorite portrait photographers, Ben Baker, was profiled on Feature Shoot, one of my must-read photo sites.
FWIW, Ben looks nothing like the peanut butter cup above, but it fit the theme. It was from a junk food series shot for The Sun back in 2007.
-30-
Chủ Nhật, 10 tháng 5, 2009
Variations on a Two-Light Theme, Pt. 1
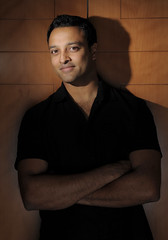 People always ask me how many flashes they should have. That's an easy one -- however many you can afford, plus one or two.
 See? Easy.
But a good, basic kit is two speedlights -- plus the assorted doohickeys needed to make them work well. And after all, if you have just one flash and it goes down you are merely an available light photographer. (Not that there's anything wrong with that.)
Two lights not only give you lots of options but serve as insurance, too. Starting today, we will be looking occasionally at some different, two-light portrait setups.
Nothing too fancy pants. But not the typical stuff, either. Details on the shot above, after the jump.
__________
Not Another Umbrella / Rim Light
I say that because I went to this well way too often in my early days. Not only that, the umbrella always seemed to come from the right front, and the rim from the back left.
Why? I have absolutely no idea. I was like a little "lighting function key" or something. Press me, and you'd get a camera right umbrella portrait with a back left rim. Go figure.
Nothing if not consistent, I suppose. Perfectly acceptable -- certainly compared to on-camera or bounced flash. But... boring, Sydney.
Not to dis. If done subtly and with regard for the ambient, that technique can look elegant. But if you have two lights you can create a look without the need for any contributory ambient, which is a term I just
Soft / Hard Combo
Usually, my workflow when setting up a two-light, flash-only shot is to build the fill first. Choose the quality of fill light, expose for it, then knock the aperture down to build whatever lighting ratio you want. Then add the key, salt to taste, and simmer for two minutes until the sauce thickens.
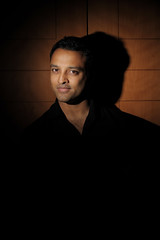 But this time we were already working with a gridded key, which by itself looked like the photo at left.
Not bad, if you are into floating heads.
Bringing in the fill from just below on-axis (see photo up top) gave a cool up-light to Riaz's arms. It also wrapped an atypical, 3D-ish light when combined with the key. And the slight specular you can see on the wall down low is also from the fill.
That specular erases much of the shadow on the wall created by the fill, which makes the light a little hard to reverse at first blush. That's because the missing shadow doesn't seem to play by the rules.
The top of the fill light (shoot-thru umbrella) was just below the lens, which meant that the center point for the fill was a foot and a half or so below the lens axis. The ratio was about two stops down -- a good two stops, as Miracle Max would say in The Princess Bride.
I like the look for a few reasons -- it is controlled, I can produce it just about anywhere with two flashes and it is a little bit atypical. That last one is always a plus in my book.
When the Ambient is Not Your Friend
Having some two-light, flash-only solutions in your pocket is a good fallback when you ambient is crappy and your only backdrop is a wall. This wood-paneled wall is actually pretty cool. But later in this series we will be up against the more garden-variety white version.
Speedlinks: May 11, 2009
It's been a loooong while since the last speedlinks. And since those tidbits never stop coming in, this edition is of the Xtra Large ilk.
Among today's offerings: LOTR, ice cave shooting, burning stuff with light, studio strobes in the rain, a road trip, Erika Larson, and more. Inside.
__________
• Are you an LOTR fan? (Hint: If you have to ask what LOTR stands for, you aren't.)
There is a new fan-produced moviecoming out and Strobist reader Alex Beckett shot some of the stills. (Orcs and speedlights!) Oh, and you can see the trailer and learn more about the movie here.
• One of many interesting recent tidbits from the Redux Blog: Time Asia runs a setup shot. Add my vote to those hoping this is a new trend...
• Flash in an ice cave? Sure, why not?
• Totally awesome: This is how they play with light at the Googleplex.
• It's Profotos in the rain in this video of an ESPN Magazine shoot of Kelly Slater. Thanks to Steve for the tip.
• Photographer Ben Baker kicked butt on a series of high-end "board of directors" shoots for Fortune Magazine. Andrew at WTJ was all over it with plenty of behind-the-scenes stuff.
• Photographer Paul Souders is on a USA road trip. His dispatches are beautifully illustrated, funny and quick-hit. Perfect fodder for any shooter's RSS reader, and highly recommended.
• If you keep a camera in your car, and you love it, make sure it is wearing one of these.
• Redux shooter Erika Larson's interview on Zoom-In contains beautiful images and some very wise words for portrait photographers. (Thanks, Myles.)
Among today's offerings: LOTR, ice cave shooting, burning stuff with light, studio strobes in the rain, a road trip, Erika Larson, and more. Inside.
__________
• Are you an LOTR fan? (Hint: If you have to ask what LOTR stands for, you aren't.)
There is a new fan-produced movie
• One of many interesting recent tidbits from the Redux Blog: Time Asia runs a setup shot. Add my vote to those hoping this is a new trend...
• Flash in an ice cave? Sure, why not?
• Totally awesome: This is how they play with light at the Googleplex.
• It's Profotos in the rain in this video of an ESPN Magazine shoot of Kelly Slater. Thanks to Steve for the tip.
• Photographer Ben Baker kicked butt on a series of high-end "board of directors" shoots for Fortune Magazine. Andrew at WTJ was all over it with plenty of behind-the-scenes stuff.
• Photographer Paul Souders is on a USA road trip. His dispatches are beautifully illustrated, funny and quick-hit. Perfect fodder for any shooter's RSS reader, and highly recommended.
• If you keep a camera in your car, and you love it, make sure it is wearing one of these.
• Redux shooter Erika Larson's interview on Zoom-In contains beautiful images and some very wise words for portrait photographers. (Thanks, Myles.)
Congrats to Dave Honl
 Most of you guys like to ape great shooters. That's Dave Honl, left, shooting a great ape.
 I wanted to take a minute to raise a glass to Dave, who has just taken his in-house light mods business to a whole new level -- thanks in large part to support from this community...
We Knew Him When
Less than two years ago, Dave Honl started making his now-famous speedlight modifiers. And when I say "making," I mean that as in sewing them himself, packaging them, packing and shipping -- a one-man band.
As of last month, Dave will now be free to do other things, like, say, sleeping and eating -- maybe even taking a picture or two. That's because his light mods are henceforth being distributed by ExpoImaging, whom you may have noticed on the right sidebar.
This means fewer all-nighters for Dave and wide availability for his mods. ExpoImaging even went eco-friendly with the new packaging, which is cool.
Congrats (and welcome) to John and Erik at EI, as Honl's mods join a fast-growing roster of very lighting-friendly stuff, including the Ray Flash ring flash adapter and the classic Dean Collins DVDs of which I am a huge fan.
Way to go, Dave. Take a deep breath, pop a cold one and enjoy some well-deserved famliy time. And on behalf of Dave, John, Erik and myself, thanks much to the readers of this site for your support.
Thứ Năm, 7 tháng 5, 2009
Universal Translator Ushers in New Age of Cheap, Off-Camera Harmony
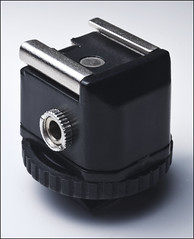 This little nubby little thing may not look like much, but it is an off-camera solution for just about any speedlight that includes manual settings. It'll give a sync jack to a camera, too.
It's cheap, small and will almost pay for itself the first time you buy a sync cord.
Full deets, inside.
__________
Smaller than a golf ball and clocking in at
(You Sony folks are out of luck. But you get the D3x chip for under three grand, so I don't wanna hear any griping.)
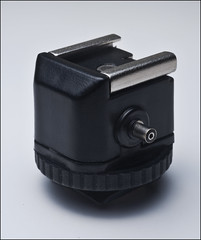 It features a hot shoe on top and bottom, and dual sync options for corded use. Like the LumoPro LP120 (the first production run of which is sold out, with more expected in a few days) it has both a PC sync and a 1/8" minijack sync.
 When paired with an LP120, any PC-less camera can now go off-camera flash with nothing more than an inexepnsive mono audio patch cord. This is the same jack used my AlienBees, PocketWizards and others. So if you are using, say, AB's, this would free you from the PC Cord Mafia forever and also serve as a cheap, rock-solid backup to whatever current wireless method you may be using.
PC connections
If neither your camera nor your flash has a PC jack, two of these babies (along with a 1/8"-to-1/8" mono cord) will completely set you up, cheaply wired for action. A male-to-male PC cord will connect them, too.
This is PW reliability at eBay remote prices, with the only downside being a little extra height in the umbrella. This is because the hot shoe in the bottom makes the 1/4x20 thread impossible.
(NOTE TO SELF: Hmm.. maybe not... perhaps a V2 model should come with the male and female hot shoes on adjacent sides -- top and side -- leaving room for a 1/4x20 thread opposite the female hot shoe mount. Then, just rotate it 90 degrees if using it on top of the camera. I'll see if that feature is possible on a future run.)
The female hot shoe is necessarily generic. If your proprietary flash is wobbly up top, you may wish to secure it with a ball bungee, rubber band or some gaff. I always did that when putting a later SB on a generic shoe.
Anything to Anything
Long story short, whatever flashes you may have lying around that have a selectable manual power setting, just became off-camera friendly. It even works with the notoriously picky SB-600.
I realize that this is basically the equivalent of spreading a little bloody chum in the waters of the cheap used flash market on eBay. But please make sure your flash has a safe trigger voltage before joining it with your DSLR baby via a direct, wired connection. Probably better to wait a few weeks for the prices to drop back down, too. And there's always Craigslist.
I cannot tell you how happy I am that this thing is finally here. The 1/8" jack was my idea. Not that it was complicated, of course. Just one of those "duh" moments when trying to figure out how to remove unnecessary expense from the lighting stuff.
PC cords just do not need to be proprietary. Or maybe it's just me. I dunno -- what are your thoughts on the minijack vs. PC thing? Hit us in the comments.
Thanks to MPEX for making this happen, as it lowers the cost of entry to off-camera flash for many, many people.
__________
Product Page: Universal Translator
NOTE: Several people have pointed out that Flashzebra sells a similar item at a similar price. That one is not hot on the bottom and does not include PC options. But it does have a 1/4x20 underneath.
Thứ Ba, 5 tháng 5, 2009
Sadly, This Still Doesn't Quite Get You to McNally Territory
Sometimes you need a little extra power when there is nary a monobloc in sight. For one quick solution, follow the bouncing ball bungee as Paul Morton and Darren Stevenson show you how to mount three SB-800's into a softbox.
This is 3x better than the cheater, which will mount suspend a single SB in a speedring with the CLS window showing, a la the Strobies XS setup.
But remember, three strobes only buys you a stop and a half more power. The first additional flash doubles your power, which adds one more stop. The second one goes halfway to doubling it again, adding another half stop. But put them on 24mm zoom for good coverage and lose the internal baffle and you can definitely get up to full sun-balancing levels at close range.
Thanks much to both Paul and Darren for the how-to. (If you are reading this via email or RSS feed, click the title to pull up the full post and see the video.)
-30-
Thứ Bảy, 2 tháng 5, 2009
This Stuff Ain't Rocket Science

Pictured above are the students in last week's five-day lighting class in Paso Robles, CA. Teaching one of these extended classes was a first for me. And while I was expecting a fun, intense week, what was more interesting was watching the students to see how they learned.
That was an eye-opener, to say the least. We had a wide range of ages, personalities and learning styles. And I am more convinced than ever that anyone -- anyone -- can learn to light in a relatively sophisticated way in a pretty short amount of time.
Some thoughts, punctuated by their photos, after the jump.
__________
NOTE: Photos are credited at the bottom of the post. Click on any photo to see it bigger in a new window.
The Usual Suspects
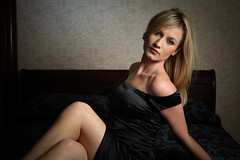 One of my biggest apprehensions before the week was having no idea where the students would be, ability-wise, when they arrived. Would some of them be long-time pros? Would some be rank beginners? Worse yet -- maybe a mix of both?
So we spent some time Monday morning looking at photos and getting to know each other. And as it turned out, the class was a decent cross section of the readership of this site.
They were mostly amateurs, and some transitional pros. We had businesspeople, a dentist, a pioneering punk rocker-turned rock doc filmmaker -- even a cog in the military-industrial complex. We had all ages, from a 22-year old bachelor to several
In the end their age, profession, skill level and/or personality type really didn't matter when it came to seeing how they progressed. Which is really cool when you think about it, and also nukes about 90 percent of the excuses people have for not jumping into this stuff head first.
Left Brain, Right Brain
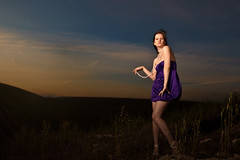 Many people look at lighting as a technical thing. In reality it is about as technical as playing with the bass and treble knobs on your stereo. And about as difficult, truth be told. I would rather be math-challenged and very creative and be learning this stuff than to be an engineer with the same goal.
Why? Because absolutely anyone can learn to do it. And when it is said and done, you'd rather be a creative person who knows how to light than a tech-head with yet one more new skill in your back pocket.
The biggest hurdle with learning to light is just deciding to do it. It's math anxiety, or being afraid to walk across the room and invite a partner onto the dance floor in sixth grade, or just about anything else that has seemed intimidating -- until you learned how to do it.
It's Not About the Gear, Either
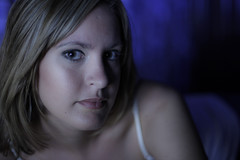 Syl Arena is the proprietor of Paso Robles Workshops, where we were all learning together. (Syl's the guy under he mop of red hair at center left.) He and I originally planned on forming the class into teams based on their brand of gear and various synching methods. In the end we ended up rotating them into a completely new group every day, making for a more diverse experience for the whole class.
We quickly realized it was not the gear that was important. Throughout the week, I could not discern any correlation between how fast someone picked up new skills and the weight of their gear bag. To be sure, you do need some stuff. But you do not need to go into hock on a bunch of high-end bodies, lenses and strobes to get great results. So, for those of you who have more time than money, take heart.
In fact, to be honest I think being a gear hog can be a handicap when learning. Practice frequently and learn to use what gear you have. Then slowly add gear only when you have a specific need. You'll make better photos that way, plus you'll prolong the fun process of gearing up.
It's All About Balance
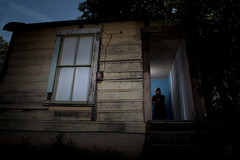 After this week I feel even more strongly that the key to understanding lighting is to become very comfortable with the concept of balance. We have talked about it in L101 and L102, and in just about every OA post. But everything comes down to how well you understand this concept. All of the other stuff is icing on the cake.
In its simplest form, begin by assessing your ambient. Make a normally exposed photo. Tamp down the exposure a little, until you get a photo that would make a nice "floor" exposure for your final, lit image. Then lay in your light, be it soft and flattering, hard and edgy, or anything in between. We have a little visual run-through of that process coming shortly. And that will reiterate just how easy it is.
Once you get that ambient/flash two-step down pat, you can begin your all-flash photos that way, too. Now you can lay in your fill, ensuring that whatever your key fails to illuminate will fall to exactly what you want. And now you have control over both the quantity and quality of your fill, which is when the photos really start to get interesting.
All of the various styles of key lighting, the light mods, synch methods, gelling, etc., rely on the foundation of balance. Unlock balance, and everything falls into place.
Build Muscle Memory
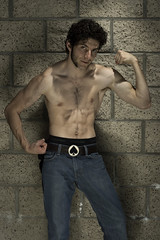 Once you get the concept, play. A lot. That is a big part of the strength of a five-day workshop -- total immersion learning. I demo'd on Monday, and they shot every other day.
 But you can do it at home, too. Make headshots of family and friends. Photograph your own house as a project. Try new fill methods and accent lighting styles.
Reps matter -- every time you previsualize a photo in your mind then pull it off with your camera and flashes, you get better. Heck, by the time they walked in with their shoot on Thursday morning, many were almost looking a little cocky.
With practice, you also get more comfortable stretching your comfort zone. Do it again and again until you are so familiar with the balancing light that it is almost subconscious.
The majority of the fifteen people that showed up one week ago on an chilly Monday morning were amateurs who could best be described as "tentative" in their approach to lighting. We had some nice stuff in the opening images, of course. But most everyone there had more desire to learn than experience at that point.
By the end of the week the problems were far more granular, which is to say that the big stuff was being solved easily. And there was a comfort level that belied where they were just a five days ago. People were taking chances, engaging their subjects and lighting almost intuitively. Almost.
Don't Forget to Make a Picture
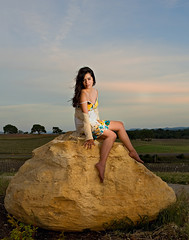 Lots of rookie lighting photogs crash here. They spend so much energy working out the light that they neglect the most important part of the process. Save your subjects' attention spans for when you are done with the lighting tweaks away and ready to start making photos.
 Engage your subjects. Work through a steady stream of conversation. Don't stick them up there like a mannequin and bore them silly by shooting a frame and disappearing into chimping mode. Seriously, I see this a lot and it is a really bad thing.
That brings us back to muscle memory concept. It is just like doing math. The better your algebra is, the more comfy you will be with the trig. When lighting, if your technical stuff is effortless, you are free to engage the subject with all of your attention. That pays off with great photos -- that happen to be beautifully lit.
Collaborate
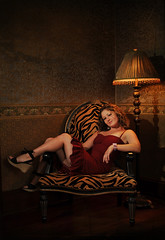 The dynamic of team learning is hard to beat. Go to a meetup. Find another local shooter and practice some together. They understand you way better than your poor spouse does. Another lighting photographer will be a VAL (voice-activated light stand) or VAB (same, but a boom) for you until their arms fall off, simply because they want to see what the light can do from way up there, too.
Collaborate with other photogs to gain confidence, then collaborate with subjects toward the goal of making interesting photos. Everyone wins, and you get better fast.
Seventeen Shooters, Eighteen Flashes
For our quickie group shot seen up top (it took us about ten minutes, soup to nuts) we decided to light entirely by flash. This was done by shooting at a 250th of a sec at a decent aperture -- way above the ambient. We had a PW'd Canon speedlight on a stand in a shoot-thru right next to the camera. Almost a ring light look, if you will.
We exposed for the umbrella fill and then closed down the aperture about two stops. At that point, all that was left was for everyone to light themselves with either an SU-4'd SB-800 or an LP120. (Tim, close to the middle, had a Canon speedlight with an off-board slave, I think.)
The contrast range was courtesy the ratio between the facelights and the umbrella fill; key light courtesy the subjects.
About the Photos on This Page
The images seen here were done by (mostly) amateur and transitional pro shooters, and for the most part without my involvement. We lectured hard on Monday afternoon and Tuesday morning, then shot each other on Tuesday afternoon. On Wednesday and Thursday we got access to models and two very different locations.
For Friday's assignment, we turned up the pressure several notches. (I wouldn't want to ruin the surprise unless we do it again, and if you tip anyone in the comments you won't be published.) But suffice to say I could have called in sick on Friday and these guys still would have knocked the cover off of the ball.
Credits, in order from top: Everyone in the group photo (it was a self-timer shot), Steven Nguyen, William Yu, Tim Bosma, Sam Graham, Sean Rolsen, Richard Clary and Victory Tischler-Blue.
__________
SPECIAL NOTE TO THE PRW STUDENTS: Whittling down the selects list was a bear, and very sorry to not have something from all 15 shooters. If you would like your credit to link someplace, shoot me an email from the address used in the Paso Robles group email list and let me know where to link it. I will do so ASAP-est.
Thanks much for for such an awesome week. It was a total pleasure to work with you guys.
Đăng ký:
Nhận xét (Atom)